Arduino Projects Beginner
You want to start with electronics.
You want a real project that works.
Then try this Arduino projects beginner guide.
Build a smart parking system.
It uses sensors, lights, and moving gates.
It shows real-time status on a screen.
And it teaches you core skills fast.
No prior knowledge needed.
Just follow the steps.
This is one of the best Arduino projects for beginners.
It’s fun. It’s visual. It’s rewarding.
Why This Smart Parking System Is Perfect for Arduino Projects Beginner
Parking is hard in cities.
Cars circle around looking for space.
Now imagine a system that shows free spots instantly.
That’s what you’ll build.
And it’s perfect for Arduino projects beginner.
Because it uses simple parts.
It runs on cheap hardware.
Yet it feels like real tech.
You learn sensor reading.
You learn how servos move.
You learn how screens display data.
All in one Arduino projects beginner build.
Plus, you can show it off.
Kids love it.
Teachers praise it.
It’s great for science fairs.
What You’ll Learn in This Arduino Projects Beginner Guide
This isn’t just about building.
It’s about learning key skills used in every Arduino projects beginner path.
- Sensor Input: Read 8 IR sensors using only 3 pins.
- Shift Registers: Use 74HC165 to save digital pins.
- LCD Display: Show live data on a 16×2 screen.
- Servo Control: Open and close gates automatically.
- LED Feedback: Green = open, red = full — instant signals.
Each step builds your confidence.
By the end, you’ll understand how real systems work.
And you’ll be ready for more Arduino projects beginner level or beyond.
Parts Needed for Your Arduino Projects Beginner Parking System
You don’t need rare parts.
All components are common and low-cost.
Here’s your full list for this Arduino projects beginner idea:
- Arduino Uno (or Elegoo equivalent)
- 74HC165 shift register – saves pin count
- 8 IR sensors – detect cars in each spot
- 2 extra IR sensors – for entry and exit detection
- 2 servo motors – control gate movement
- 16×2 LCD display – shows parking status
- Green LED + Red LED – visual feedback
- 2 x 220Ω resistors – protect LEDs
- 8 x 10kΩ pull-down resistors – stabilize sensor readings
- Breadboard and jumper wires – easy connections
💡 Tip: Most Elegoo starter kits include all these parts.
So if you’re starting out, get an Elegoo Super Starter Kit.
You’ll use them again in future Arduino projects beginner builds.
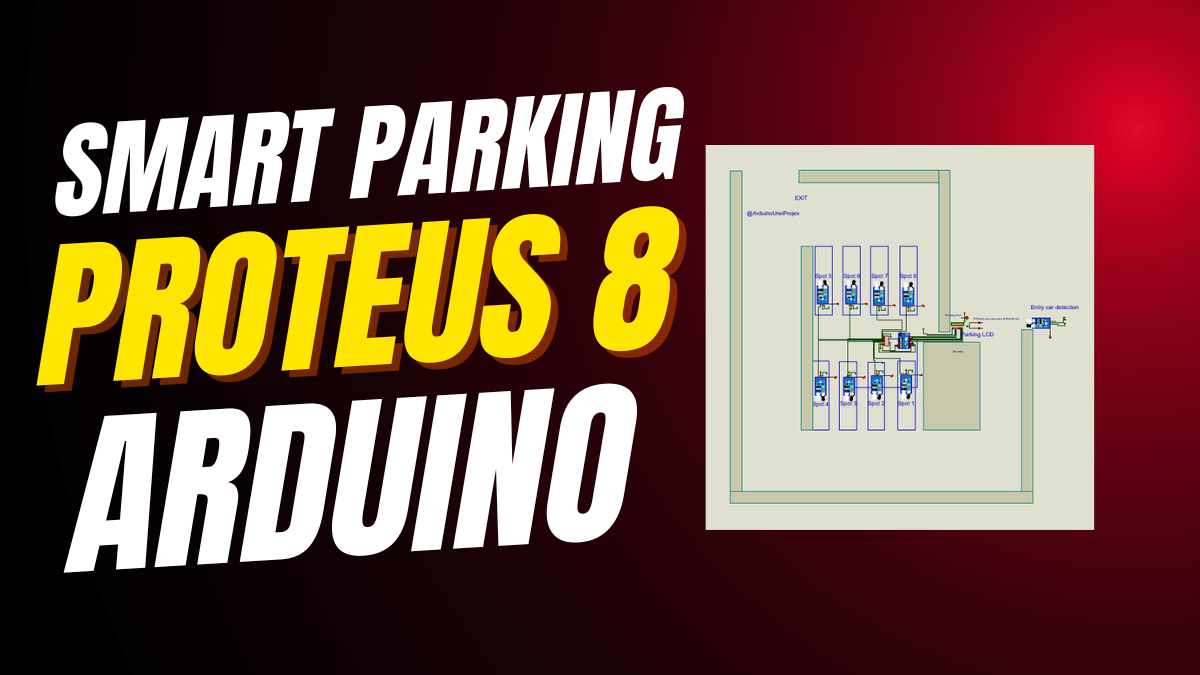
How the Arduino Projects Beginner Parking System Works
Let’s break it down simply.
Eight parking spots have sensors.
Each sensor tells the Arduino if a car is there.
But instead of using 8 pins, we use a 74HC165 shift register.
It reads all 8 sensors using just 3 Arduino pins.
Smart, right?
When a car arrives at the entrance, the IR sensor detects it.
If any spot is free, the green LED turns on.
The entry gate opens via servo motor.
After 500ms, it closes.
If no spots are free, the red LED blinks.
The gate stays closed.
On exit, another IR sensor triggers the exit gate.
It opens briefly and closes.
Meanwhile, the LCD updates every half second.
It shows “Y” for free spots and “X” for taken ones.
All of this makes sense when you see it run.
And it’s all part of one complete Arduino projects beginner experience.
Wiring Guide for Your Arduino Projects Beginner Build
Good wiring means success.
Follow these steps carefully.
Connect the 74HC165 Shift Register
This chip is key to saving pins.
Wire it like this:
- D0–D7 → 8 parking IR sensors
- SH/LD → Arduino A1
- CLK → Arduino Pin 3
- SO (Serial Output) → Arduino Pin 2
- VCC → 5V
- GND → Ground
Add a 10kΩ resistor from each sensor to GND.
This stops false readings.
Hook Up LCD, LEDs, and Servos
Use standard 4-bit mode for the LCD:
- RS → 13
- E → 12
- D4 → 11
- D5 → 10
- D6 → 9
- D7 → 8
Green LED → Pin 7 (with 220Ω resistor to GND)
Red LED → Pin 6 (same setup)
Entry Gate Servo → A2
Exit Gate Servo → A3
Entry IR Sensor → Pin 4
Exit IR Sensor → Pin 5
💡 Pro Tip: Power servos separately if they jitter.
USB power alone may not be enough.
Arduino Code for This Arduino Projects Beginner System
The code uses three libraries: LiquidCrystal, Wire, and Servo.
They come with Arduino IDE.
No download needed.
#include <Wire.h>
#include <LiquidCrystal.h>
#include <Servo.h>

// LCD pins
LiquidCrystal lcd(13, 12, 11, 10, 9, 8);

// 74HC165 pins
#define SH_LD A1 // Shift/Load Bar pin
#define CLK 3    // Clock pin
#define SO 2     // Serial Output pin

// LEDs
#define green 7  // Green LED for gate open
#define red 6    // Red LED for parking full

// IR sensors
#define ENTRY_SENSOR 4 // Entry sensor pin
#define EXIT_SENSOR 5  // Exit sensor pin

// Servo motors
Servo entryGateServo; // Servo for entry gate (A2)
Servo exitGateServo;  // Servo for exit gate (A3)

// Number of parking spots
const int NUM_SPOTS = 8;
bool spots[NUM_SPOTS]; // Parking spot statuses
int freeSpots = NUM_SPOTS; // Counter for free spots

void setup() {
  // LCD setup
  lcd.begin(16, 2);
  lcd.clear();

  // Servo setup
  entryGateServo.attach(A2);
  exitGateServo.attach(A3);
  entryGateServo.write(0); // Keep entry gate closed
  exitGateServo.write(0);  // Keep exit gate closed

  // 74HC165 control pins
  pinMode(SH_LD, OUTPUT);
  pinMode(CLK, OUTPUT);
  pinMode(SO, INPUT);

  // LEDs
  pinMode(green, OUTPUT);
  pinMode(red, OUTPUT);
  digitalWrite(green, LOW);
  digitalWrite(red, LOW);

  // IR sensors
  pinMode(ENTRY_SENSOR, INPUT);
  pinMode(EXIT_SENSOR, INPUT);

  Serial.begin(9600);
}

void loop() {
  // Read parking spot statuses
  readShiftRegister(spots);

  // Calculate free spots
  freeSpots = 0;
  for (int i = 0; i < NUM_SPOTS; i++) {
    if (!spots[i]) {
      freeSpots++;
    }
  }

  // Handle entry
  if (digitalRead(ENTRY_SENSOR) == HIGH) {
    if (freeSpots > 0) {
      digitalWrite(green, HIGH);
      entryGateServo.write(90); // Open gate
      delay(500);
      entryGateServo.write(0);  // Close gate
      digitalWrite(green, LOW);
    } else {
      digitalWrite(red, HIGH);
      delay(500);
      digitalWrite(red, LOW);
    }
  }

  // Handle exit
  if (digitalRead(EXIT_SENSOR) == HIGH) {
    exitGateServo.write(90);
    delay(500);
    exitGateServo.write(0);
  }

  // Update LCD
  lcd.clear();
  lcd.setCursor(0, 0);
  lcd.print("1|2|3|4|5|6|7|8|");
  lcd.setCursor(0, 1);
  for (int i = 0; i < NUM_SPOTS; i++) {
    lcd.print(spots[i] ? "X|" : "Y|");
  }

  delay(500); // Refresh every 500 ms
}

// Function to read the shift register
void readShiftRegister(bool ar[NUM_SPOTS]) {
  digitalWrite(SH_LD, LOW);  // Load parallel data
  delayMicroseconds(5);
  digitalWrite(SH_LD, HIGH); // Switch to shift mode

  for (int i = 0; i < NUM_SPOTS; i++) {
    digitalWrite(CLK, LOW);
    delayMicroseconds(5);
    ar[i] = digitalRead(SO); // Read bit
    digitalWrite(CLK, HIGH);
    delayMicroseconds(5);
  }
}
How the Code Works – Step by Step
In setup(), the code starts the LCD, attaches servos, sets pin modes, and turns off LEDs.
In loop(), it calls readShiftRegister().
This function reads all 8 sensors through the 74HC165.
It loads data, then shifts it out one bit at a time.
Next, the code counts how many spots are free.
If someone approaches the entrance and spots are free,
the green LED lights up.
The entry gate opens for half a second.
If full, the red LED flashes.
At exit, the exit gate opens automatically.
Finally, the LCD updates with “X” for occupied and “Y” for free.
It refreshes every 500 milliseconds.
Fast. Clear. Functional.
Testing Your Arduino Projects Beginner Parking System
Upload the code first.
Open the Serial Monitor at 9600 baud.
It won’t print data, but confirms the board runs.
Now test step by step.
Cover one parking sensor.
The LCD should change that spot from “Y” to “X”.
Wave your hand at the entry sensor.
If spots are free, green LED turns on.
The entry gate opens briefly.
Try the exit sensor too.
The exit gate should open.
Common Issues and Fixes
- Sensors not responding? Check GND connections and add 10kΩ pull-down resistors.
- Servos jittering? Use external 5V power.
- LCD blank? Adjust contrast potentiometer or check wiring.
- No gate movement? Confirm servo signal pin and power.
Fix one thing at a time.
Retest after each fix.
Why Use a Shift Register in Arduino Projects Beginner Builds?
Arduino Uno has limited pins.
You need some for LCD.
Some for servos.
Some for LEDs.
If you use 8 pins for sensors, you run out fast.
The 74HC165 solves this.
It reads 8 inputs using only 3 pins.
That frees up your board.
And it’s easy to use.
So, this trick appears in many advanced Arduino projects beginner might later explore.
Upgrade Ideas After Completing This Arduino Projects Beginner Project
Once it works, make it better.
Here are ideas to grow your skills:
- Add Wi-Fi with ESP8266 to send data to a phone app.
- Chain two 74HC165 chips to monitor 16 spots.
- Replace servos with stronger motors or linear actuators.
- Use ultrasonic sensors instead of IR for better accuracy.
- Connect to Raspberry Pi for camera-based license plate recognition.
Each upgrade teaches something new.
Soon, you’ll be doing complex Arduino projects beginner once thought impossible.
Final Thoughts: Start Your Arduino Projects Beginner Journey Today
This smart parking system is ideal for Arduino projects beginner.
It combines sensors, logic, output, and motion.
It uses affordable parts.
It gives instant visual results.
And it prepares you for bigger things.
So gather your kit.
Follow the wiring.
Upload the code.
Watch it work.
Feel proud.
Then build the next one.
👉 Get the Elegoo UNO Super Starter Kit – All Parts Included
👉 Or grab the 37-in-1 Sensor Kit for More Arduino Projects Beginner Ideas
You’ve got this.
Now go make something awesome.


Leave a Reply